Overview
Phone menus (IVR - Interactive Voice Response) transform your single business number into a sophisticated call routing system. Callers hear professional greetings and navigate to their desired destination using keypad selections or voice commands—just like calling a large enterprise, but achievable for any size business.Understanding phone menus
What callers experience When someone calls your number when you have a phone menu:- They’ll hear a custom greeting message you’ve recorded or uploaded
- They’ll hear a series of menu options (“Press 1 for Sales, 2 for Support…”)
- They make their selection via keypad or voice
- They’re immediately and automatically routed to the right destination
- Professional image: Makes you sound like a larger organization
- Efficient routing: It gets callers to the right person faster
- Reduced interruptions: It filters out spam and robocalls, which don’t usually know what to do when faced with a phone menu
- Self-service options: You can help people get the information they need without staff needing to pick up the phone
- Scalability: You can handle more calls without more staff or complexity
Phone menus are available on Business and Scale plans. Starter plan users can upgrade to access this feature.
Setting up your phone menu
Access the call flow builder- Open Quo, formerly OpenPhone, on web or desktop
- Navigate to Settings → Phone numbers
- Select the number to configure
- Click Edit call flow under Call flow section
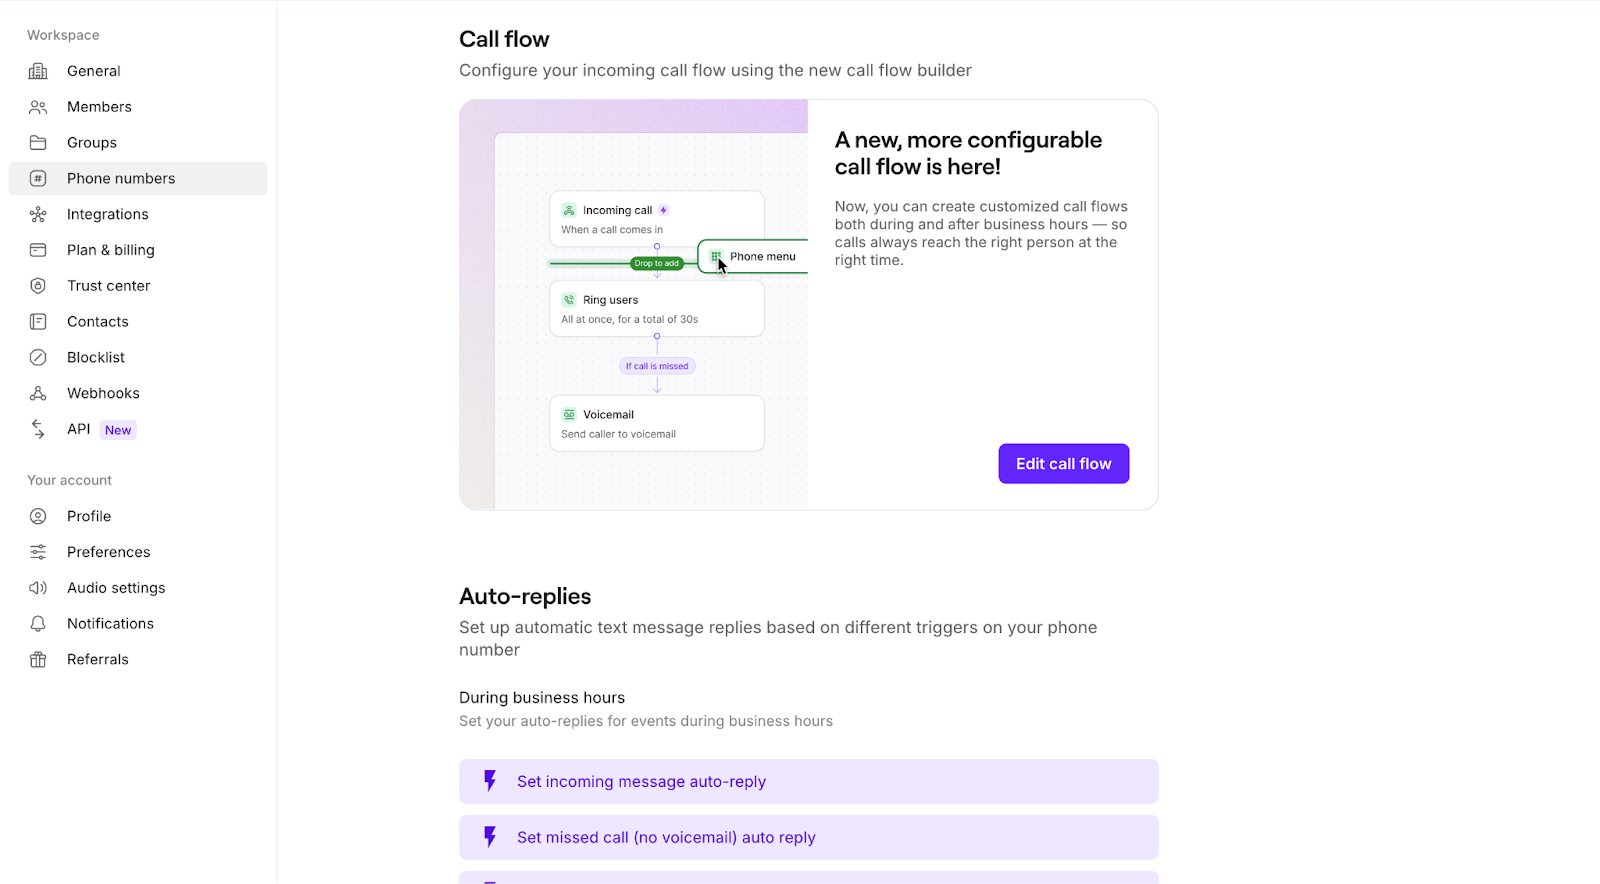
- Drag Phone menu step into the canvas
- Place it after:
- Incoming call trigger (for all calls)
- Business hours condition (for time-based menus)
- Select the step to configure settings
Configuring menu options
Create your greeting
Click Add greeting message and choose:- Upload a file: Use existing audio (MP3/WAV)
- Record: Create greeting directly in Quo
- Text to speech: Type text for professional voiceover
Set up menu options
- Click Add keypad option
- Assign numbers 0-9 to destinations
- Add voice keywords for each option
- Configure up to 10 different paths
Available destinations
Each menu option can route to:- Ring users: Connect to team members
- Voicemail: Direct to specific voicemail box
- Play audio: Share recorded information
- Forward call: Route to external numbers
- Another phone menu: Create multi-level menus
- Sona AI agent: Let AI handle the call
Handle no selection
Configure what happens if callers don’t make a selection:- Default: Routes to voicemail
- Alternative options: Ring users, repeat menu, or forward
Multi-level menus
Create sophisticated menu trees for larger organizations, like in this (unsophisticated) drawing:How to set up a multi-level phone menu
To add a multi-level phone menu to your call flow:- **In the call flow builder, **drag in the
Phone menustep from the side panel. - Add your first-level options (0–9).
- To nest a menu, drag an additional Phone menu step under one of your first-level phone menu options.

Call flow builder routing options
Each key press (0–9) can:- Route to any other Call Flow Builder step (e.g., Ring users, Forward, Play audio, voicemail, Sona)
- Route to another Phone menu (a nested menu)
- Tip: Use Go to to avoid recreating steps (e.g., reuse an existing voicemail or agent group)
- Add a go to step to the canvas, then select any existing step on the canvas you want to route to
- Use Repeat menu to loop the caller back to the current menu or main menu.
In case of no selection
If a caller doesn’t press anything:- Use Repeat menu to give them another chance
- Route to another option (e.g. Voicemail, Ring users, Forward or Sona) to avoid frustration
- ✅ Keep it short: Limit menus to essential options. People want to talk to someone, not get stuck in a loop.
- ✅ Use commands: You can add a voice command (e.g. “1”), then mention in your greeting: “Press or say 1 to reach Support”
- ✅ Use Go to to reuse steps and simplify complex flows.
- ✅ Send callers to Sona, your AI agent, to reduce wait time and handle FAQs.
- ⚠️ Avoid excessive depth: We recommend keeping menus within 2 to 3 levels max.
Other advanced configurations
Time-based menus
Different menus for different times: Business hours menu: Full options with live routingMenu design best practices
Keep it simple- 3-4 options maximum: Prevents overwhelming callers
- Logical grouping: Putting related options together will make sense for callers
- Most popular first: Reduce average navigation time
- Clear descriptions: Avoid jargon or ambiguity
- Start with company name: Confirms they called the right number
- Be concise: Don’t record for longer than 20 seconds total
- Speak clearly: Keep a moderate pace so people can keep up
- Include zero option: Always offer a way out
- Self-service options: Reduce call volume
- Quick escape: Easy path to human help
- Consistent numbering: Same options across menus
- Test regularly: Call your own number monthly
Common phone menu patterns
Small businessFAQs
How many menu options can I have?
How many menu options can I have?
Can I have different menus at different times?
Can I have different menus at different times?
Do callers have to listen to the entire greeting?
Do callers have to listen to the entire greeting?
No, callers familiar with your menu can press their selection immediately without waiting. This speeds up the experience for repeat callers.
Can menu options forward to external numbers?
Can menu options forward to external numbers?
What happens to text messages?
What happens to text messages?
Text messages bypass the phone menu entirely. All team members with access to the number receive texts directly in their inbox.
Can I create multi-level menus?
Can I create multi-level menus?
Is there an additional cost?
Is there an additional cost?
Phone menus are included with Business and Scale plans at no extra charge. Starter plans need to upgrade to access this feature.
Can I use custom extensions?
Can I use custom extensions?
Currently, Quo supports single-digit options (0-9). Multi-digit extensions like 101 or 2145 aren’t available yet.