Overview
Call flows are your roadmap for managing incoming calls—from the moment someone dials your number to when they reach the right person or resource. With Quo’s visual call flow builder, you can design sophisticated call routing without any technical expertise, ensuring every caller gets the best possible experience whether you’re available or not.Understanding call flows
What makes a great call flow
Effective call flows balance automation with human touch:- Quick connections: Route callers to the right person or department immediately
- Professional experience: Maintain your brand voice even when you can’t answer
- Flexibility: Handle different scenarios (business hours, holidays, high volume)
- Clarity: Simple navigation that doesn’t frustrate callers
Core components
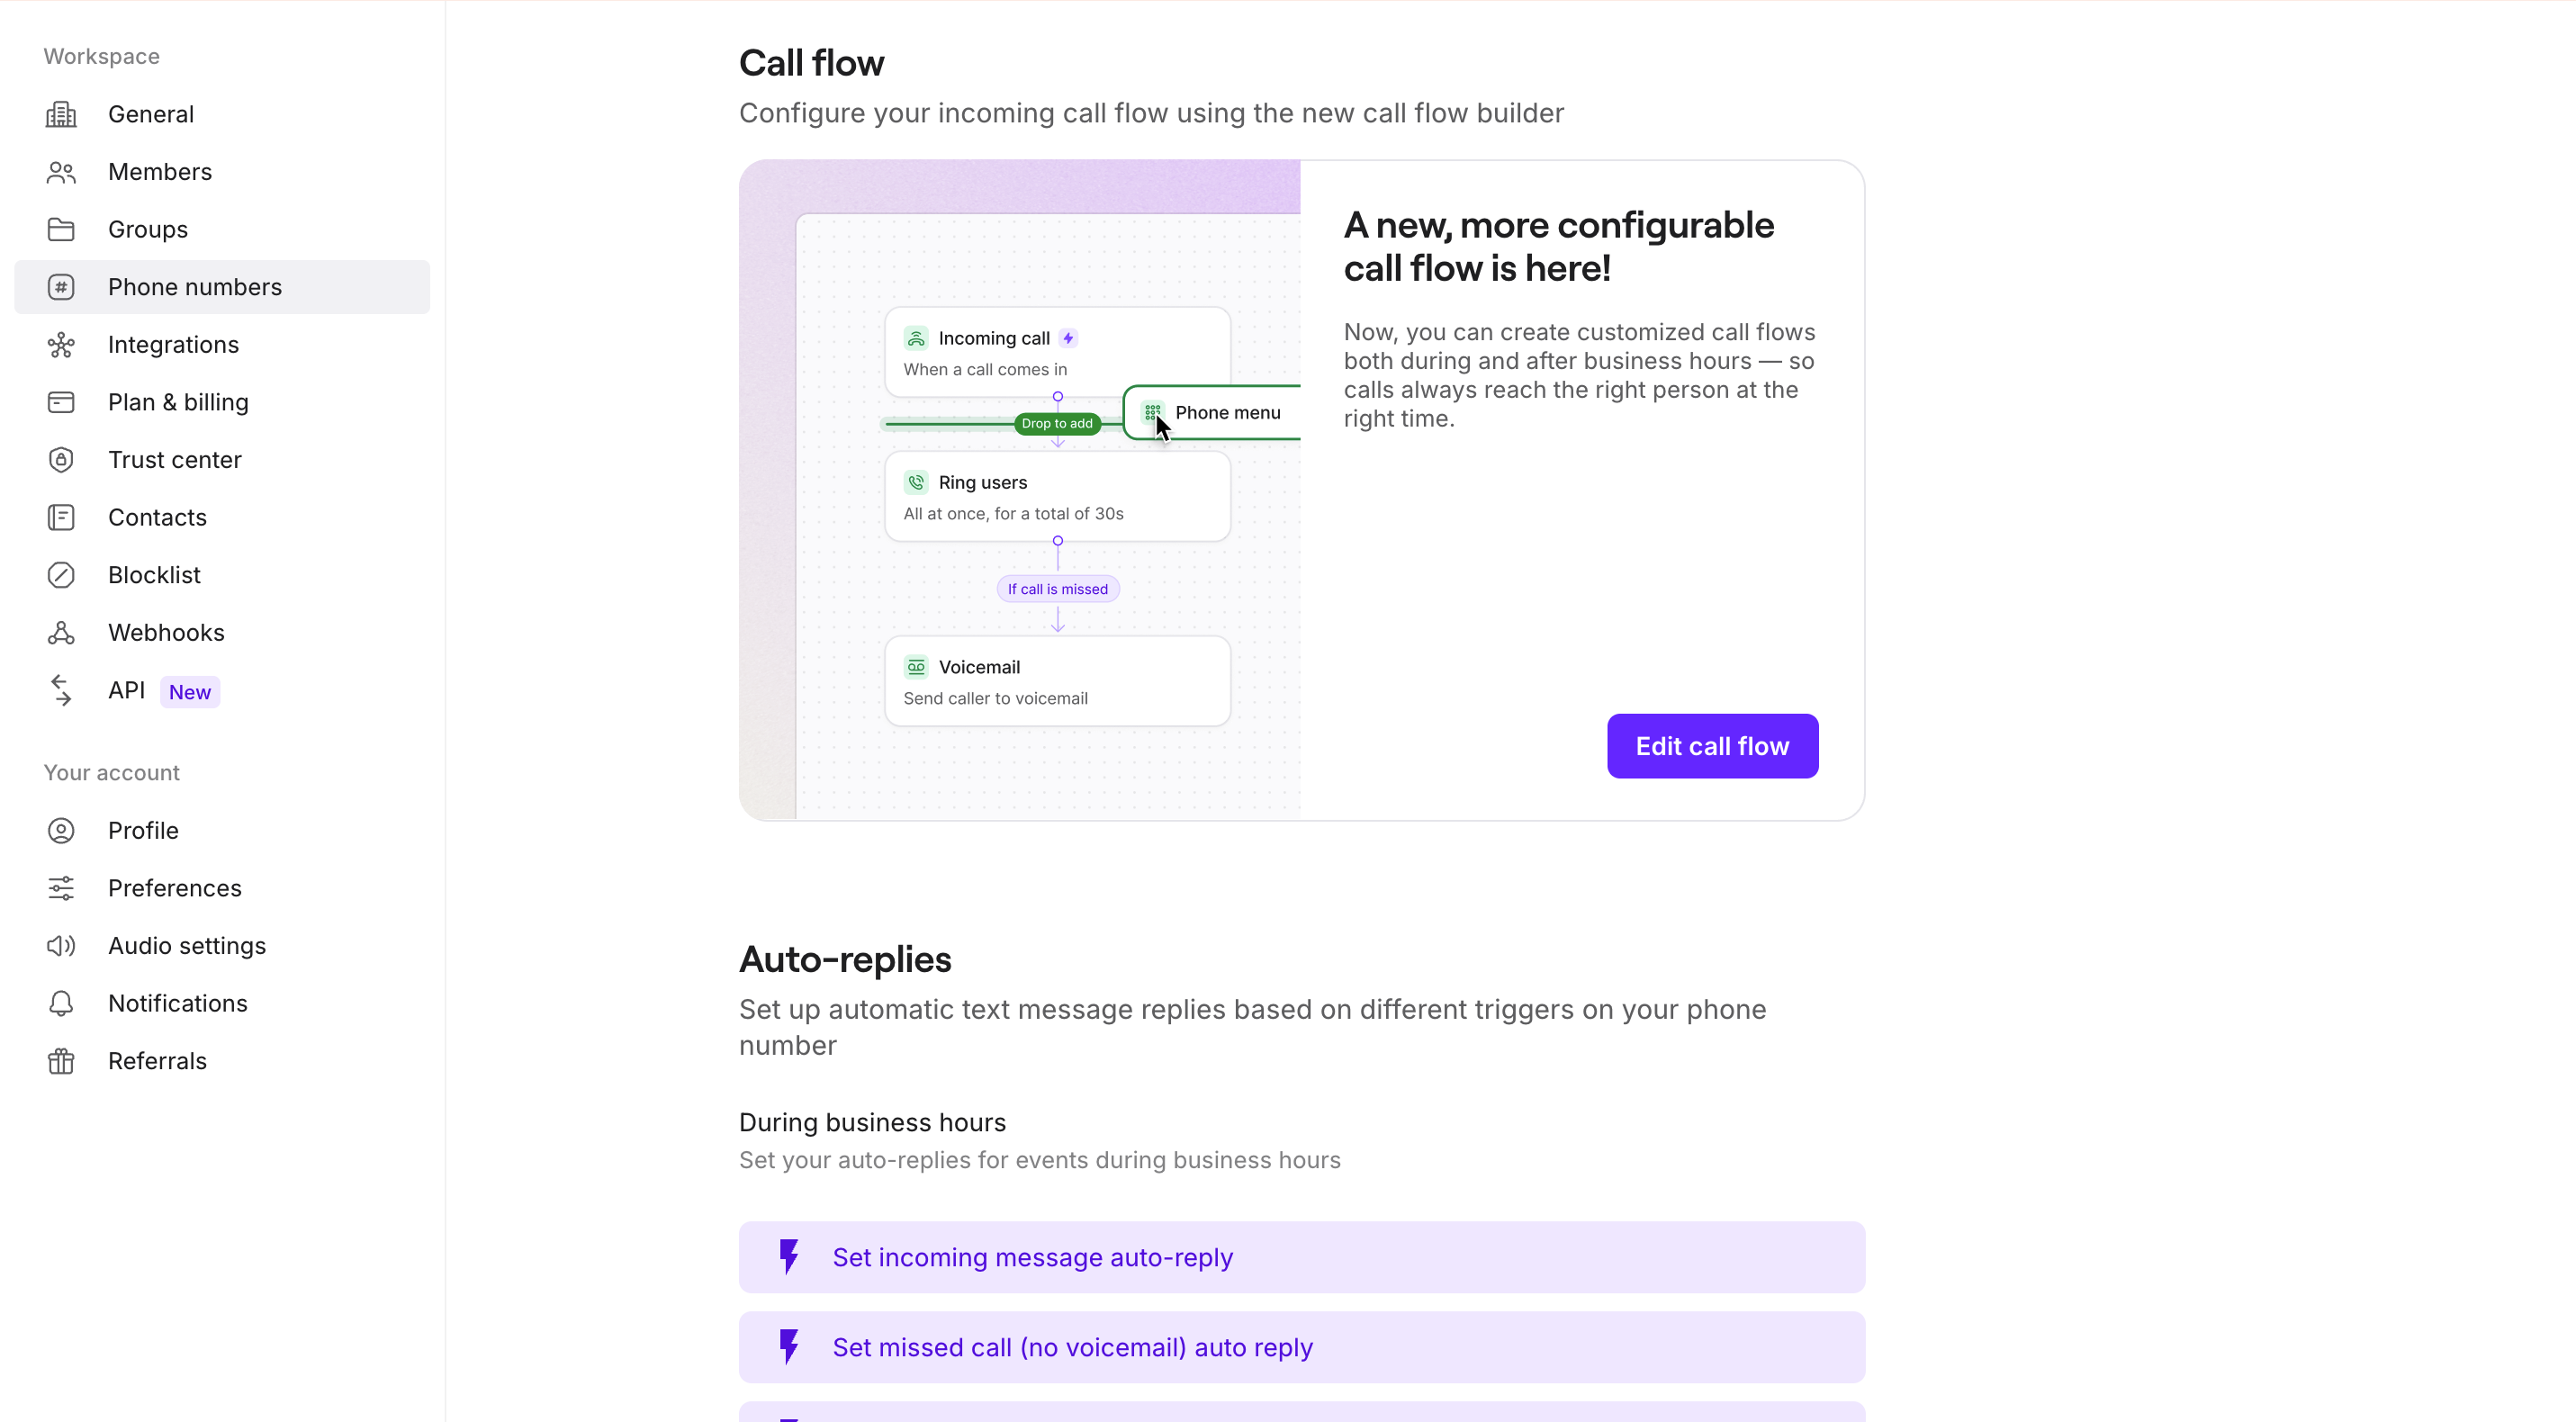
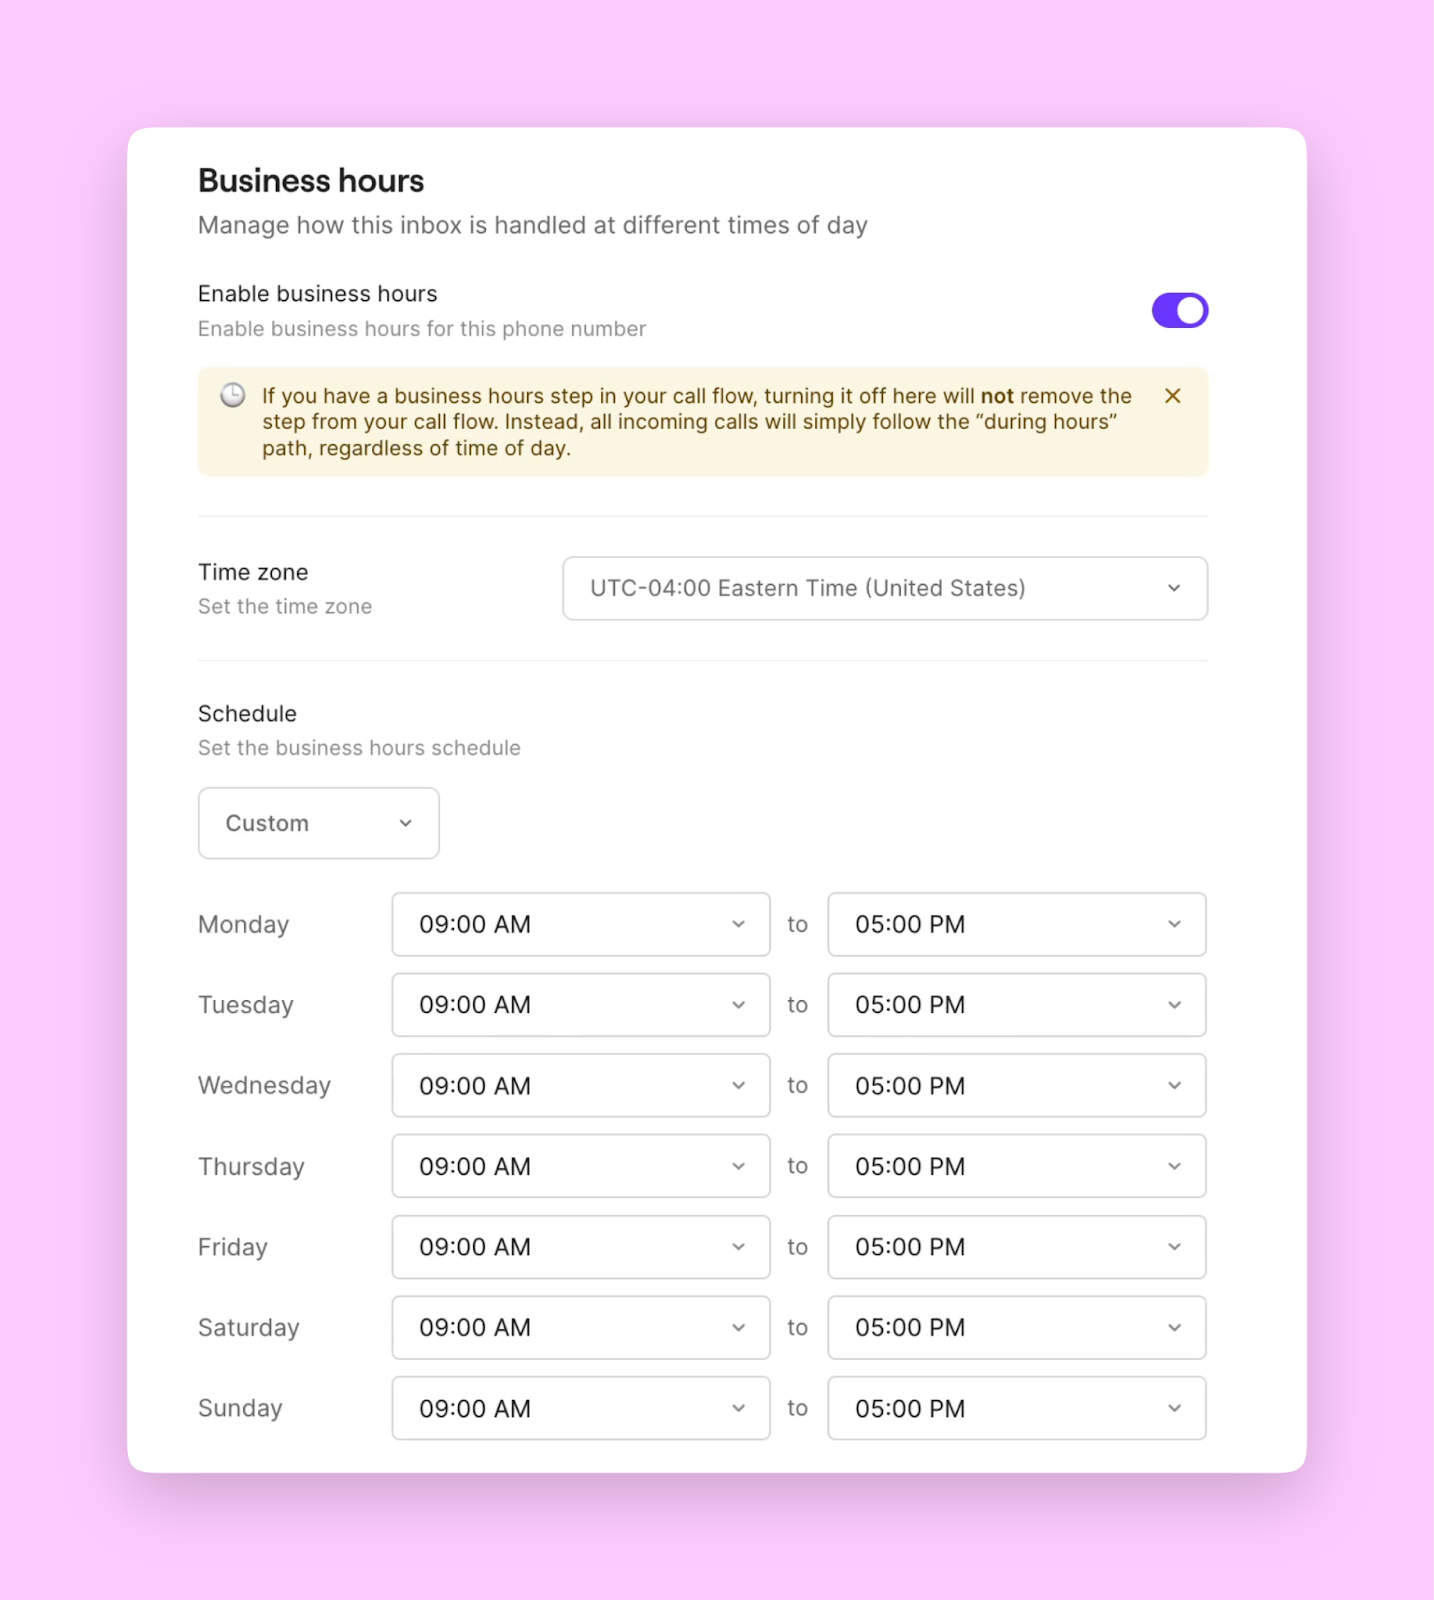
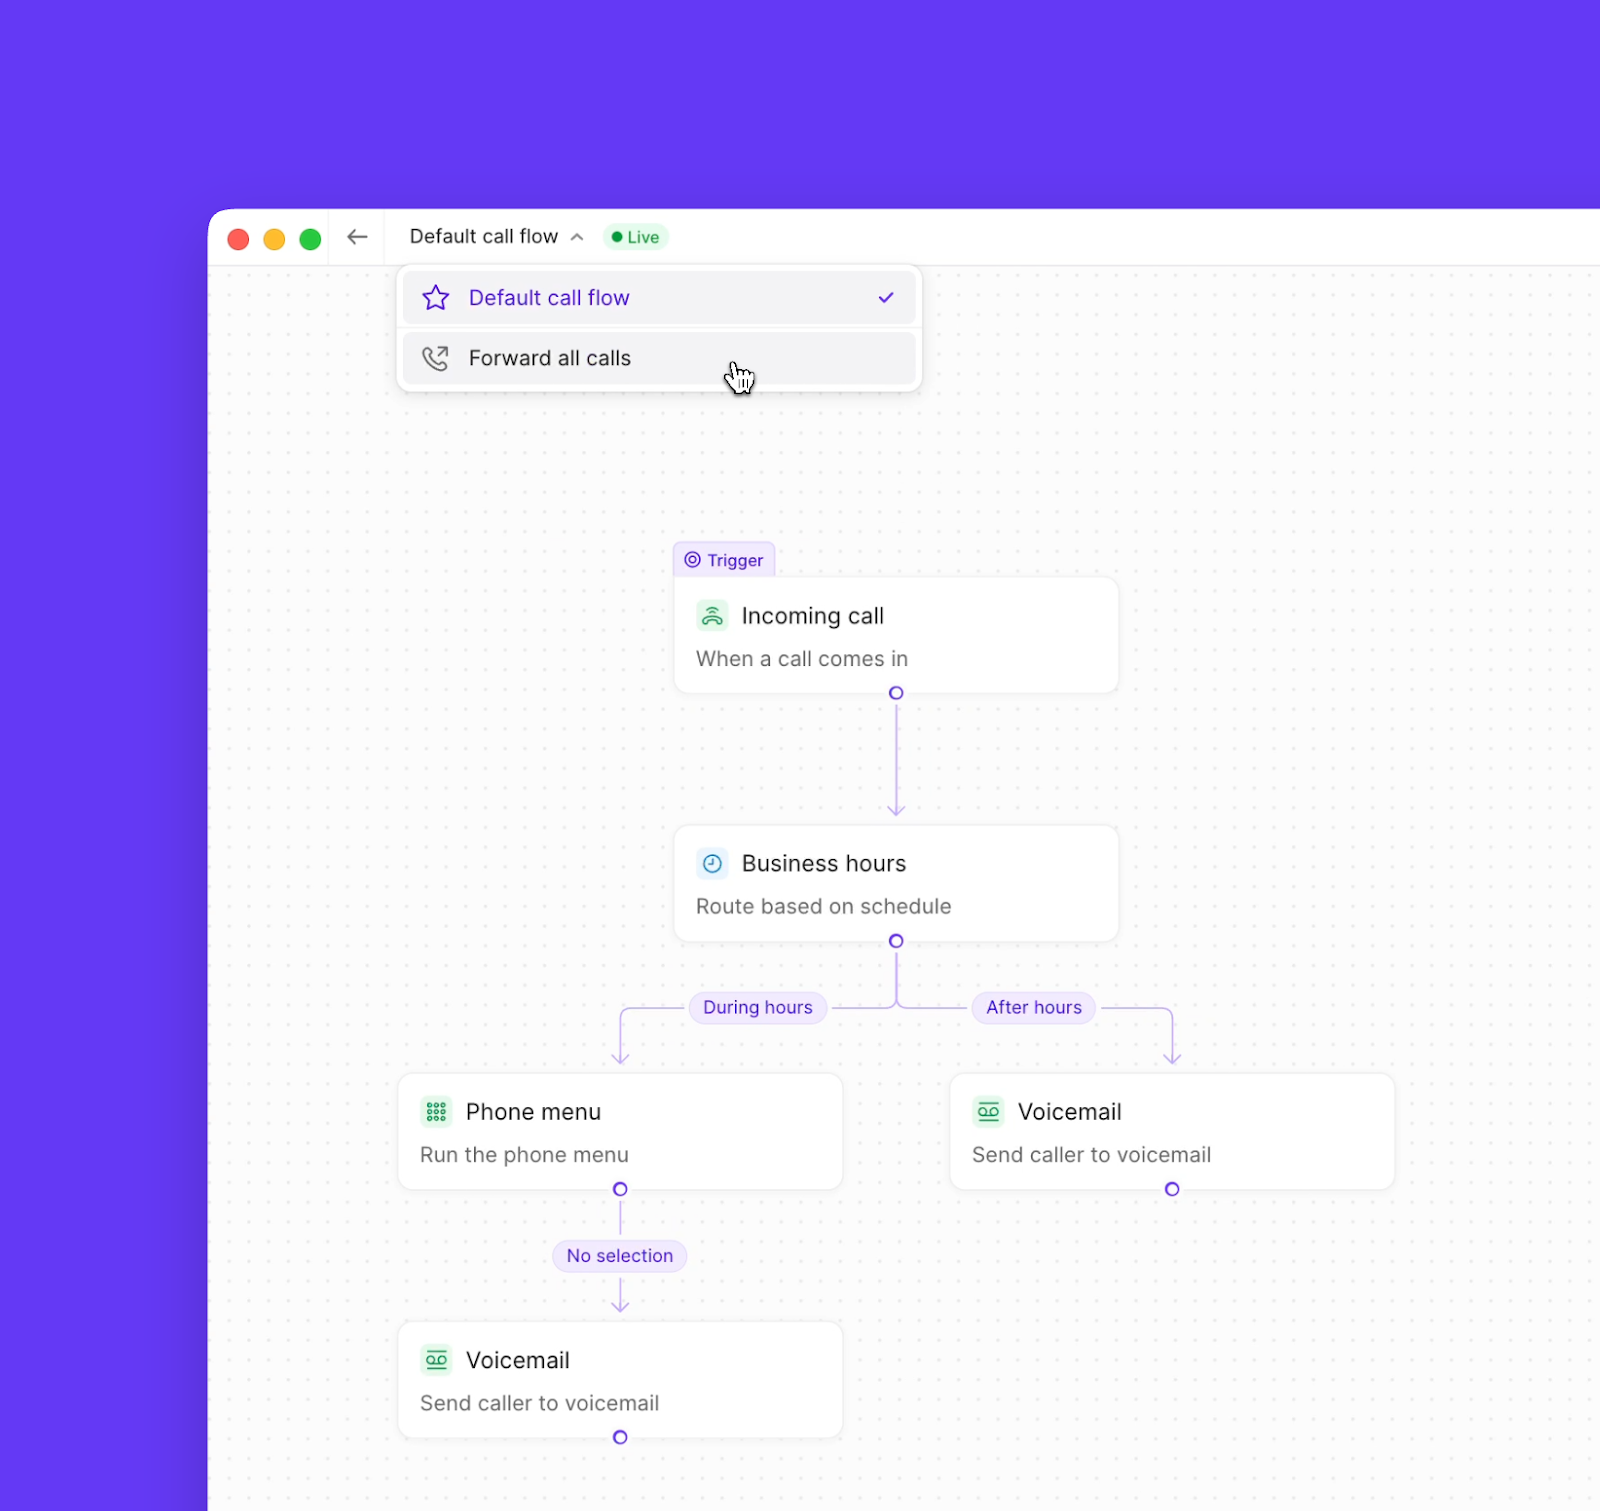
Quo’s call flows consist of five building blocks that work together:- Business hours: Define when you’re available to take calls
- Phone menu (IVR): Let callers choose their destination
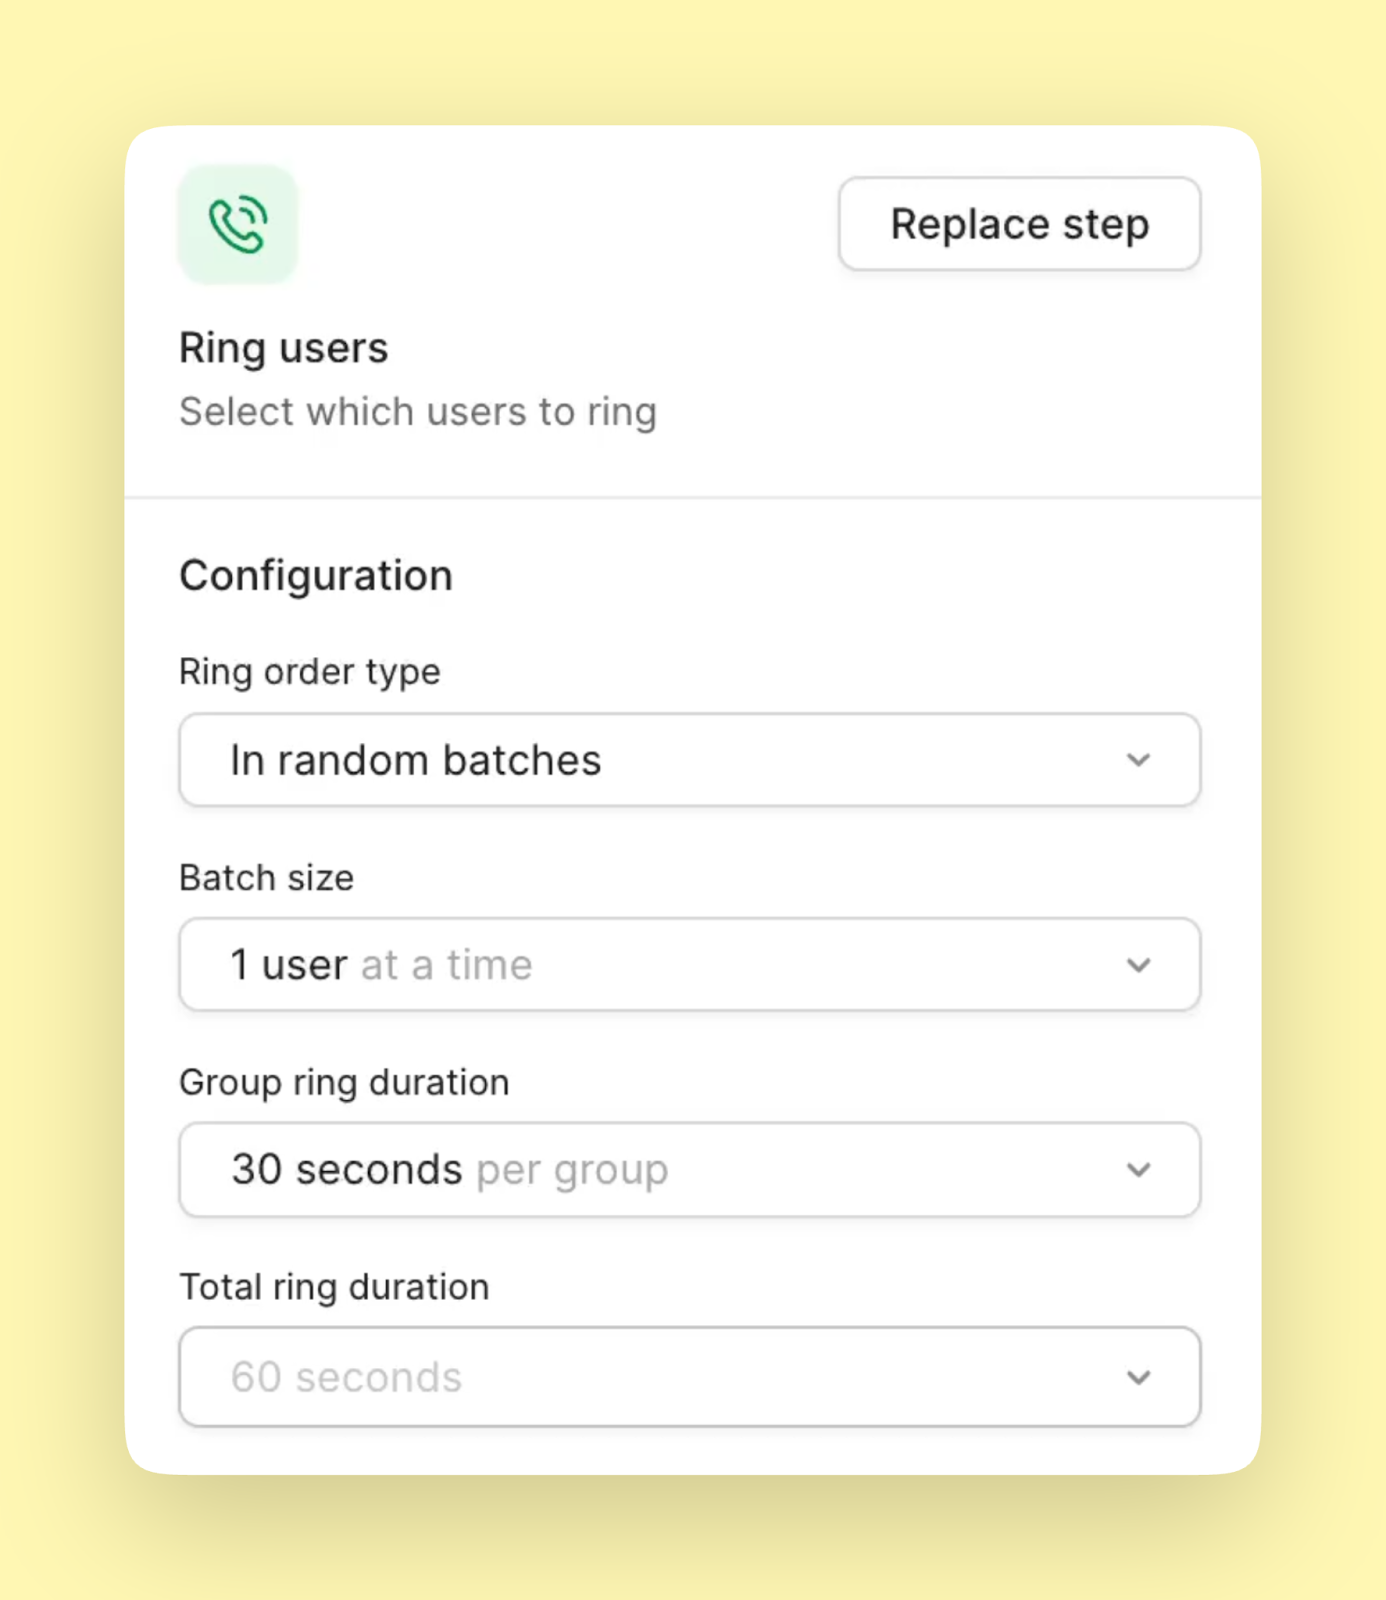
- Ring groups: Control who receives calls and in what order
- Play audio: Share greetings, announcements, or information
- Voicemail: Capture messages when no one can answer

Getting started with the call flow builder
Accessing the builder
The visual call flow builder is available on web and desktop. You can simply follow this link to open the call flow builder in your account or you can:- Navigate to Settings
- Under Workspace, click Phone numbers
- Select the phone number you want to configure
- Under Call flow, click Edit call flow
Understanding the interface
The builder uses a visual canvas where you drag and drop components:
- Canvas: The visual workspace where you design your flow
- Steps panel: Available components you can add
- Configuration panel: Settings for the selected step
- Connection lines: Show how calls flow between steps
Building your first call flow
Basic structure
Every call flow starts with an incoming call trigger. From there, you can add steps to create your ideal caller experience: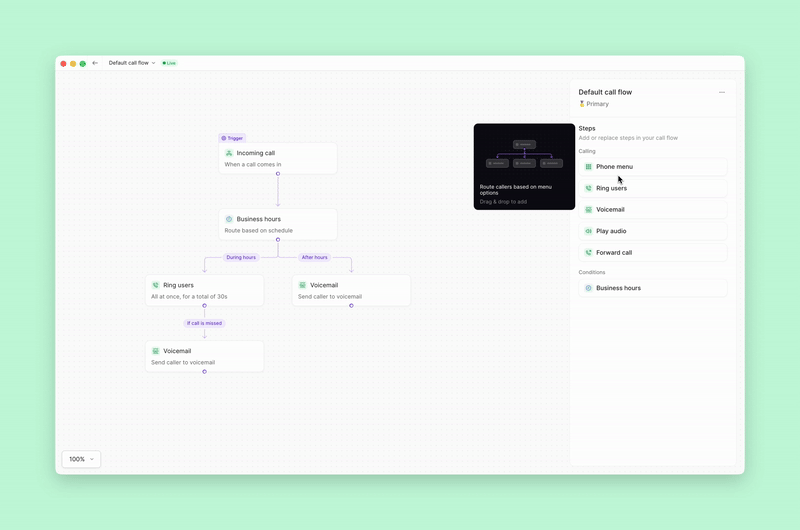
Step-by-step example
Let’s build a professional call flow that handles calls differently during and after business hours:- Add business hours condition
- Drag the Business hours step after Incoming call
- This creates two paths: During hours and After hours
- Configure during hours path
- Add a Phone menu for department selection
- Route each option to appropriate ring groups
- Set voicemail as fallback
- Configure after hours path
- Add a Play audio step with after-hours message
- Route to voicemail or emergency forwarding
Advanced configurations
Multiple phone menus
Create sophisticated routing with nested menus:- Main menu for departments (Sales, Support, Billing)
- Sub-menus for specific teams or languages
- Self-service options that play recorded information
Intelligent ring strategies
Optimize how calls reach your team:- All at once: Everyone rings simultaneously (fastest response)
- Random batches: Distribute call load evenly
- Custom groups: Route by expertise or availability
- Single user: Direct to specific team members
Backup routing
Ensure no call goes unanswered:- Forward to external numbers after hours
- Route to Sona AI agent for 24/7 availability
- Create overflow paths during busy periods
Publishing and managing changes
Save your work
Changes aren’t live until you publish:
Always test your call flow after publishing. Call your number from another phone to experience what callers hear.
Multiple call flows
Manage different scenarios with ease:- Default call flow: Your standard routing
- Forward all calls: Temporary routing to another number
- Toggle between flows without rebuilding
Next steps
Now that you understand call flows, explore specific components in detail:Business hours
Set your availability schedule
Phone menu
Create interactive voice menus
Ring groups
Configure team call distribution
Voicemail
Set up professional greetings
FAQs
Can I have different call flows for different numbers?
Can I have different call flows for different numbers?
Yes, each phone number in your workspace can have its own unique call flow. This is perfect for businesses with multiple brands, departments, or service levels.
What happens to existing calls when I publish changes?
What happens to existing calls when I publish changes?
Existing calls continue using the old flow until they complete. New calls immediately use the updated flow. There’s no disruption to active conversations.
Can I schedule call flow changes?
Can I schedule call flow changes?
Currently, call flow changes take effect immediately when published. For scheduled changes (like holidays), you’ll need to manually update the flow. Consider using business hours settings for regular schedule changes.
How do I test my call flow without affecting real callers?
How do I test my call flow without affecting real callers?
The best practice is to test during off-hours or use a separate test number. You can also walk through the visual flow in the builder to verify logic before publishing.
Can callers skip the phone menu?
Can callers skip the phone menu?
What's the difference between ring groups and ring order?
What's the difference between ring groups and ring order?
Ring groups determine WHO gets called, while ring order determines HOW they’re called (all at once, in sequence, etc.). You’ll configure both to create your ideal call distribution.