Organize team members into departments or teams for efficient collaboration and resource sharing
Overview
Groups allow you to organize team members into logical units like departments, teams, or projects. Instead of selecting individual team members repeatedly, create groups to streamline sharing, mentions, and collaboration across your workspace.Understanding groups
What are groups
Groups are collections of team members that:- Share common responsibilities or departments
- Need access to the same resources
- Collaborate frequently on customer communications
- Can be referenced with a single @mention
Key benefits
- Efficient sharing: Share contacts or snippets with entire teams at once
- Quick mentions: Notify multiple people with one @mention
- Better organization: Visual representation of your team structure
Only workspace Owners and Admins can create and manage groups. Members can be added to groups and use them for mentions and sharing.
Creating groups
Access group settings
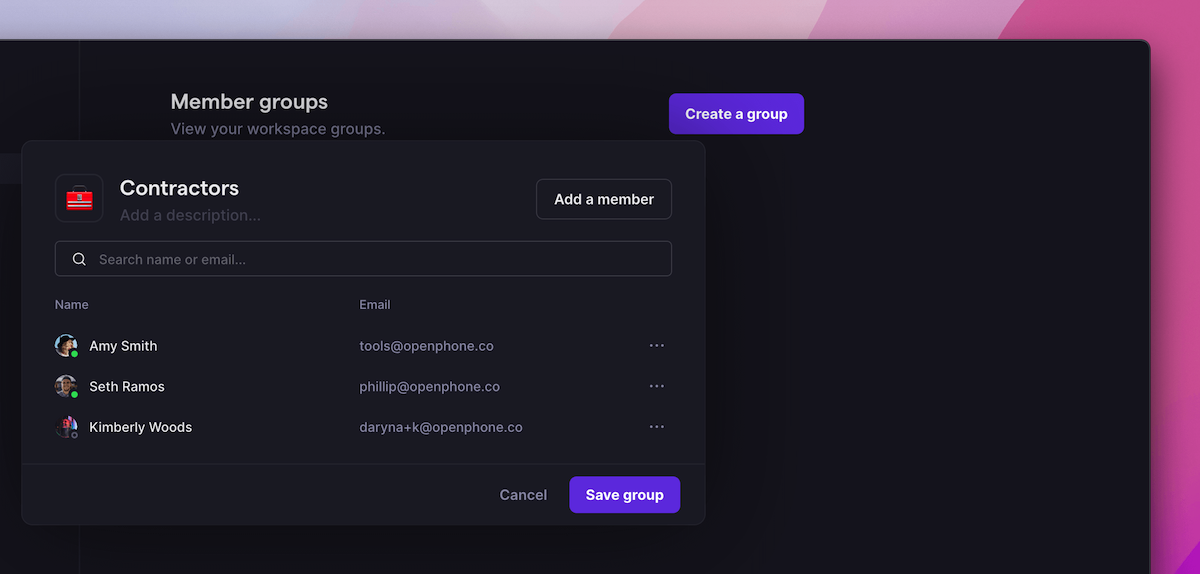
Groups can only be created from web or desktop apps:- Click Settings from the left-hand menu
- Select Groups under the Workspace section
- Click Create new group

Configure your group
Set up your group with these elements:-
Group name: Clear, descriptive identifier
- Examples: “Sales Team”, “Support Dept”, “East Coast”
-
Emoji icon: Visual identifier for quick recognition
- Click the default emoji to select a new one
- Choose emojis that represent the group’s function
-
Description (optional): Explain the group’s purpose
- Who should be included
- What resources they’ll access
- Primary responsibilities
-
Add members: Select team members
- Click Add a member
- Choose from your workspace roster
- Add multiple members at once
- Save: Click Save group to create
Use consistent naming conventions for groups (e.g., “Team - Sales”, “Team - Support”) to keep them organized in lists and mentions.
Managing existing groups
Edit groups
To modify a group:- Go to Settings → Groups
- Click on the group to edit
- Update any of these elements:
- Group name
- Emoji icon
- Description
- Member list
- Save changes
Add or remove members
Adjust group membership as your team evolves:- Add members: Click “Add a member” and select from available users
- Remove members: Click the X next to a member’s name
- Changes take effect immediately
Delete groups
Remove groups that are no longer needed:- Select the group in settings
- Click Delete group
- Confirm deletion
- Group mentions and shares remain in history
Deleting a group doesn’t remove any shared resources or permissions—it only removes the group as a mentionable/shareable entity.
Using groups effectively
Mentioning groups
Notify entire teams with a single mention:
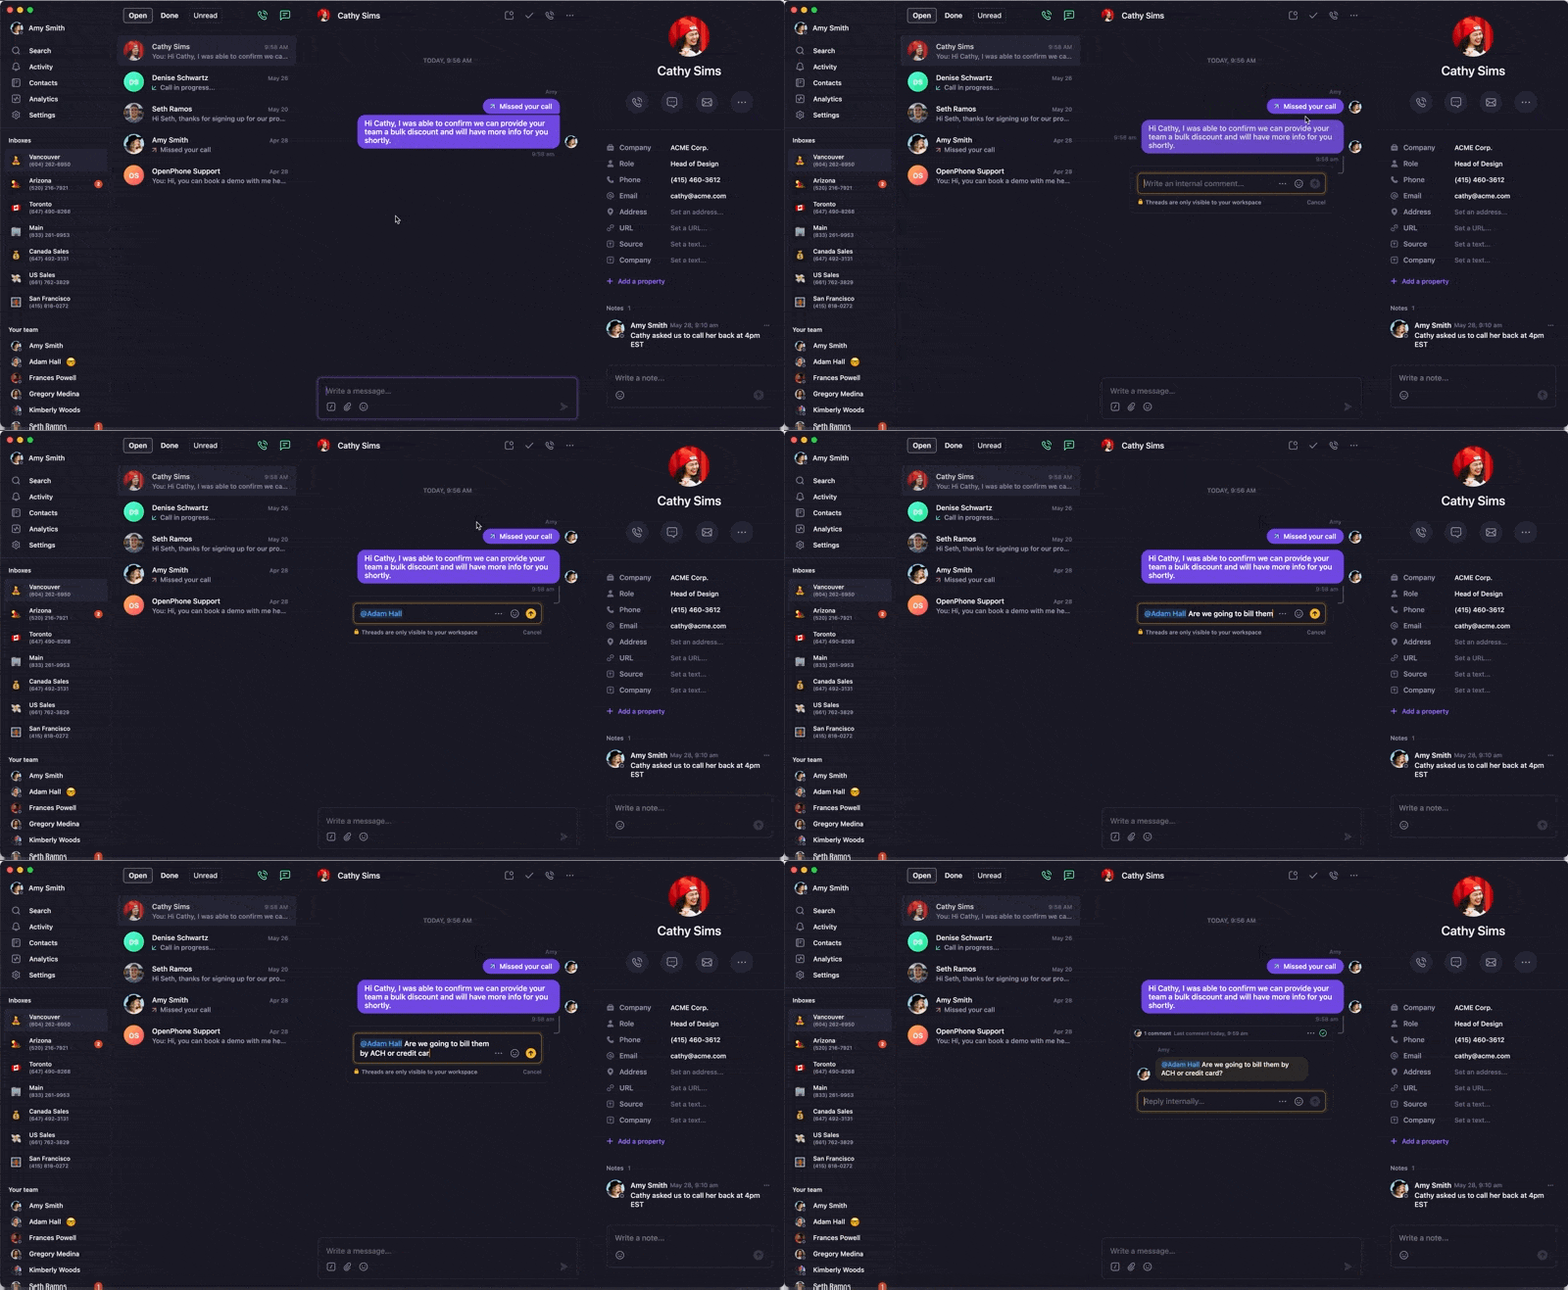
- Type @ in a thread or team message
- Start typing the group name
- Select from the dropdown
- All group members receive notification

Sharing with groups
Share resources efficiently:Contacts
- Share customer contacts with entire departments
- Ensure teams have access to relevant customer information
- Maintain consistent customer relationships
Snippets
- Distribute response templates to teams
- Ensure consistent messaging across departments
- Update templates for all members simultaneously
FAQs
Who can create and manage groups?
Who can create and manage groups?
Only workspace Owners and Admins can create, edit, or delete groups. Members can be part of groups and use them for mentions but cannot manage them.
Can I create private groups?
Can I create private groups?
All groups are visible to the entire workspace. For private communications, use direct messages between specific team members instead.
What happens when I mention a group?
What happens when I mention a group?
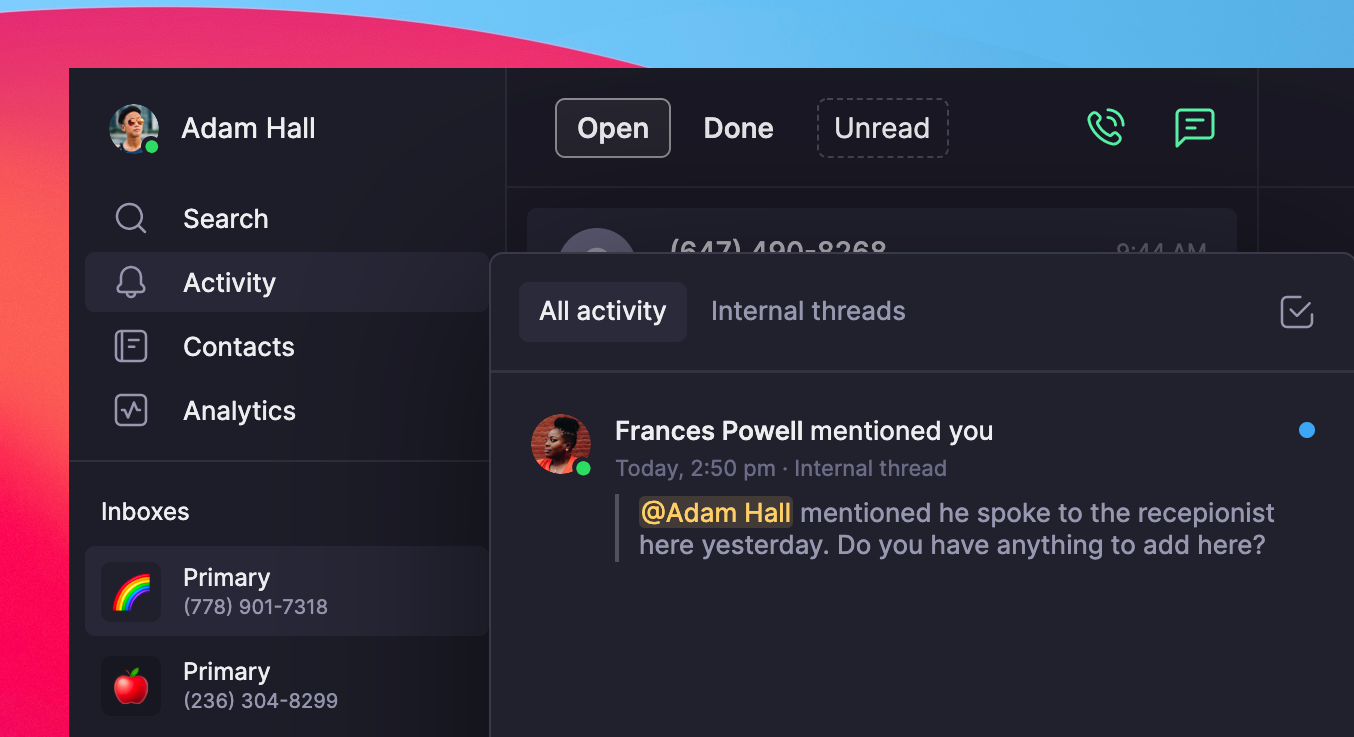
All members of the group receive a notification in their activity feed. They must have access to the shared number where the mention occurred to see it.
Can groups have sub-groups?
Can groups have sub-groups?
Groups cannot be nested. However, you can create multiple groups with overlapping members to achieve similar organization.
Do groups affect billing?
Do groups affect billing?
No, groups are an organizational feature and don’t impact billing. You’re billed per user regardless of how many groups they belong to.
Can I mention multiple groups at once?
Can I mention multiple groups at once?
Yes, you can mention multiple groups in the same message. Each group’s members will receive separate notifications.
What's the difference between groups and group messages?
What's the difference between groups and group messages?
Workspace groups organize team members for mentions and sharing. Group messages (SMS/MMS) are text conversations with multiple external recipients.
Can external users be added to groups?
Can external users be added to groups?
No, groups can only contain members of your OpenPhone workspace. External contacts cannot be added to internal groups.

